
- By Admin
- 2026/6/5
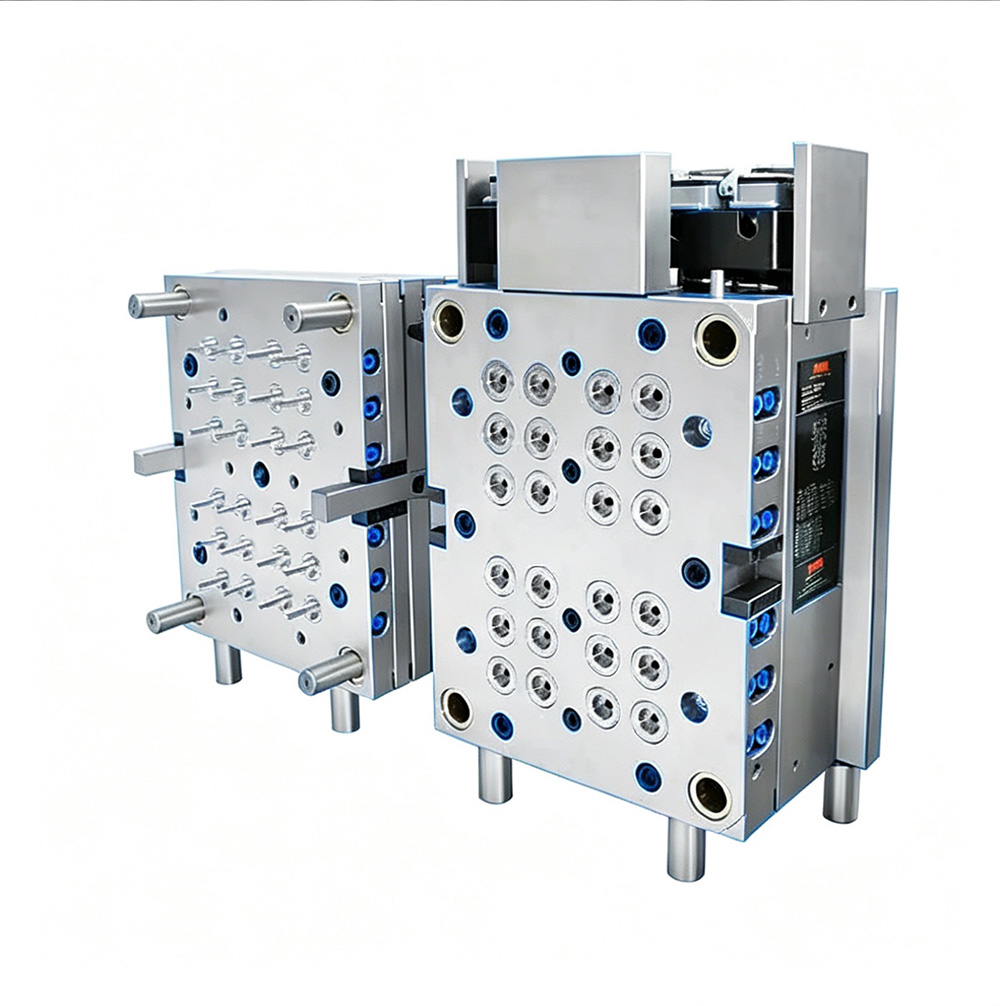
Cap Mold Rust, Wear, Corrosion? ZSMOLD Shows You How to Prevent and Repair
Rust, wear, and corrosion are the three silent killers of cap molds. They start small — a tiny scratch, a speck of rust on a cavity surface, a slightly worn ejector pin. Left unchecked, they spread, degrade cap quality, and eventually force expensive mold replacement or complete rebuilds.
The good news is that most cap mold damage is preventable. And even damage that has already occurred can often be repaired at a fraction of the cost of a new mold — typically 30–50% of replacement cost.
This article from ZSMOLD explains how to prevent these three common problems on both compression and injection cap molds and, when prevention fails, how to repair them effectively.
Part 1: Rust — The Invasive Destroyer
Why Rust Forms on Cap Molds
Rust requires three things: iron (steel), water, and oxygen. Cap molds operate in humid environments with cooling water circulating continuously. Condensation, leaks, improper storage, and even operators' fingerprints introduce moisture.
Common rust locations on cap molds:
| Location | Why It's Vulnerable |
|---|---|
| Cooling channel connections and seals | Constant water exposure |
| Mold parting lines | Condensation collects here |
| Ejector pin bores | Moisture wicks into clearances |
| Cavity surfaces (especially during storage) | No protective film of plastic |
| Mold mounting surfaces | Often overlooked in cleaning |
| Storage areas (long idle periods) | No heat to evaporate moisture |
Prevention Strategies for Rust
| Prevention Method | How It Works | Implementation |
|---|---|---|
| Use stainless or plated components | Eliminates or protects iron | Specify 420 stainless for ejector pins; electroless nickel for cooling channel connections |
| Apply rust preventative spray | Creates moisture barrier | Spray all steel surfaces before storage; reapply monthly for long-term storage |
| Control storage humidity | Removes water from air | Maintain storage area <50% relative humidity; use dehumidifier if needed |
| Dry molds before storage | Eliminates standing water | Blow compressed air through cooling channels; wipe all surfaces dry |
| Use treated cooling water | Prevents internal rust | Demineralized water with corrosion inhibitor (pH 7.0–8.5) |
| Wear gloves during handling | Prevents fingerprint rust | Fingerprint acids etch steel surfaces |
Repair Methods for Existing Rust
Light surface rust (no pitting, just discoloration):
Clean with soft cloth and rust remover solution (citric acid based preferred)
Polish with fine (600–800 grit) polishing stone
For cavity surfaces, follow with 1200 grit then buff to mirror finish
Re-passivate stainless components with citric acid passivation gel
Moderate rust (light pitting visible but shallow):
Remove pits using 400–600 grit abrasive paper (wet sanding recommended)
Polish progressively to 800, 1200, then mirror finish
Verify cavity dimension after polishing — if material removal exceeds 0.02mm, cavity may need requalification
Severe rust (deep pitting affecting function or seal):
Weld repair by certified mold welding specialist only
Re-machine and re-polish welded area to original dimensions
If cooling channels are corroded through: sleeve with stainless insert or replace affected plate
ZSMOLD note: For cavity surfaces, any rust removal that changes dimension by more than 0.02mm requires full cavity requalification. In many cases, replacing a severely rusted cavity insert is more cost-effective than repair.
Part 2: Wear — The Gradual Thief
Why Wear Occurs on Cap Molds
Wear is the progressive loss of material from surfaces in contact. In cap molds, wear happens at specific high-stress locations:
| Wear Location | Mechanism | Typical Life (cycles) |
|---|---|---|
| Ejector pins and bores | Thousands of reciprocating strokes daily | 3–8 million |
| Guide pillars and bushings | Cyclic sliding contact during mold open/close | 5–10 million |
| Cavity and core surfaces | Polymer flow erosion, especially at gate area (injection) | 10–20 million |
| Parting lines | Closing impact and flash removal | 5–15 million |
| Venting lands | Polymer residue and cleaning tools | 2–5 million |
| Dosing interface (compression) | Material drop impact | 5–10 million |
Prevention Strategies for Wear
| Wear Location | Prevention Method | Frequency |
|---|---|---|
| Ejector pins | Clean and lubricate daily; replace at 70–80% of expected life | Daily inspect; replace per schedule |
| Guide components | Daily lubrication with high-temperature grease | Every shift |
| Cavity surfaces | Remove residue before it hardens; avoid abrasive cleaning | After each run or daily |
| Parting lines | Verify clamp force not excessive; clean flash immediately | Daily |
| Venting | Clean with soft brush only; never use metal tools | Daily |
| General | Apply wear-resistant coatings (TiN, CrN, DLC) to high-wear components | At mold manufacture or refurbishment |
Repair Methods for Existing Wear
Worn ejector pins:
Replace individual pins showing scoring, bending, or diameter reduction >0.02mm
Check ejector pin bores for ovality — ream and install oversize pins if needed (typically +0.05mm or +0.10mm oversize)
Replace return springs if weakened (measure free length vs. specification — replace if <90% of original)
Worn guide pillars and bushings:
Measure clearance with dial indicator (replace if >0.03mm for caps, >0.04mm for large molds)
Replace in matched sets — never replace only one component
If mold plate damaged, ream bushing bore oversize and install repair bushing with thicker wall
Worn cavity surfaces:
Light wear (<0.02mm depth): Re-polish only
Moderate wear (0.02–0.05mm): Re-polish and re-measure; may need coating reapplication
Heavy wear (>0.05mm): Weld and re-machine, or replace cavity insert
Erosion at gate area (injection cap molds):
Weld and re-machine gate area (requires mold welding specialist)
Alternatively, install gate insert if mold design allows
Apply erosion-resistant coating after repair (TiN recommended)
Worn venting lands:
If vent depth has increased beyond specification (e.g., 0.03mm → 0.07mm), vent must be repaired
Repair by welding vent land and re-cutting to correct depth
For minor wear, simply cleaning may restore function
ZSMOLD recommendation: Keep detailed wear records for each mold. Replace wear components as sets during scheduled downtime, not after failure.
Part 3: Corrosion — The Chemical Attack
Why Corrosion Occurs on Cap Molds
Unlike rust (specific to iron/steel), corrosion affects all mold materials. In cap molding, corrosion sources include:
| Corrosion Source | Mechanism | Common In |
|---|---|---|
| Acidic byproducts from degraded polymer | HDPE, PP, and PET can release acids when overheated | All cap molding |
| Cooling water chemicals | Improperly treated water with chlorides or low pH | Cooling systems |
| Colorants and additives | Some pigments contain corrosive elements | Colored caps |
| Cleaning agents | Harsh solvents or alkaline cleaners | Maintenance |
| Recycled material contaminants | Unknown additives or residual chemicals | rHDPE, rPP |
Prevention Strategies for Corrosion
| Corrosion Source | Prevention Method |
|---|---|
| Polymer degradation | Avoid overheating material; purge properly after stops; use proper screw design |
| Cooling water | Maintain pH 7.0–8.5; use corrosion inhibitor; change water regularly |
| Colorants | Test each new colorant batch for corrosivity |
| Cleaning agents | Use only approved mold cleaners (pH 6.0–8.0) |
| Recycled material | Test each batch; reduce regrind percentage if corrosion observed |
Material selection for corrosion resistance:
| Mold Component | Standard Material | Corrosion-Resistant Alternative |
|---|---|---|
| Cavity surfaces | Tool steel (e.g., P20, H13) | Stainless steel (S136, 420) |
| Cooling channels | Uncoated steel | Electroless nickel plating |
| Ejector pins | H13 tool steel | 440C stainless steel |
| Fasteners | Zinc-plated steel | Stainless steel (316) |
| Water fittings | Brass or steel | Stainless steel or plastic |
Repair Methods for Existing Corrosion
Pitting corrosion on cavity surfaces:
Light pitting (<0.03mm depth): Polish out with 800–1200 grit
Moderate pitting (0.03–0.08mm depth): Localized stoning and re-polishing; may need coating
Deep pitting (>0.08mm depth): Weld repair or cavity insert replacement
Corrosion in cooling channels:
Flush with descaler and corrosion remover solution (follow manufacturer instructions)
If channels are severely pitted: Electroless nickel plating (requires specialized vendor, mold must be disassembled)
If channel wall perforated: Install threaded plug and re-drill offset channel, or replace affected plate
Galvanic corrosion (dissimilar metals in contact):
Replace corroded fasteners with same material as surrounding plate
Apply anti-seize compound on threads before reassembly
Isolate dissimilar metals using plastic washers or dielectric coatings
ZSMOLD note: Some corrosion damage is not repairable cost-effectively. Replace severely corroded plates rather than attempting repair. For cap molds, the cavity area is most critical — if cavity surface is deeply corroded, replacement is usually the best option.
When to Repair vs. When to Replace
| Damage Type | Severity | Recommendation |
|---|---|---|
| Surface rust | Light (no pitting) | Clean and polish — repair |
| Rust pitting | <0.05mm depth on non-critical surface | Polish out — repair |
| Rust pitting | >0.05mm depth on cavity surface | Replace cavity insert |
| Ejector pin wear | Diameter reduction <0.02mm | Repair (single pin replacement) |
| Ejector pin wear | Bores worn oval | Repair (ream and oversize pins) |
| Guide bushing wear | Clearance >0.03mm | Repair (bushing replacement) |
| Cavity erosion | <0.05mm depth | Re-polish — repair |
| Cavity erosion | >0.08mm depth | Replace cavity insert |
| Channel corrosion | Surface pitting only | Flush and protect — repair |
| Channel corrosion | Perforated wall | Replace plate |
| Parting line wear | <0.05mm material loss | Re-grind parting line — repair |
| Parting line wear | >0.10mm material loss | Replace plate or major refurbishment |
ZSMOLD Mold Restoration Service
For customers with existing damage, ZSMOLD offers a complete cap mold restoration service:
Restoration process:
| Step | Activity |
|---|---|
| 1 | Inspection and assessment: Full disassembly, measurement, and damage documentation with photos |
| 2 | Cleaning and preparation: Ultrasonic cleaning to remove all residue, rust, and old coatings |
| 3 | Repair execution: Welding, re-machining, re-polishing, and coating application as needed |
| 4 | Component replacement: New ejector pins, bushings, guides, heaters (injection), and seals |
| 5 | Assembly and testing: Full reassembly, cooling flow test, and test shots |
| 6 | Validation: Cap quality inspection (weight, dimensions, appearance) before return |
Typical results:
Restores mold to 90–95% of original performance
Cost: 30–50% of new mold price
Lead time: 2–6 weeks (depending on damage severity)
Warranty: 6 months on restoration work
Real-World Case Study: Cap Mold Restoration
Customer: Edible oil bottle cap manufacturer
Problem: 48-cavity injection cap mold, 7 years old, showing:
Cavity pitting corrosion from acidic colorants
Worn ejector pins (15% out of tolerance)
Guide bushing clearance excessive (0.06–0.09mm)
Cooling channel scale buildup
ZSMOLD restoration scope:
Replace 12 severely corroded cavity inserts
Re-polish remaining 36 cavities
Replace all 48 ejector pins
Replace all guide bushings (16 sets)
Descale and electroless nickel plate cooling channels
Full reassembly and testing
Cost and results:
| Item | Cost |
|---|---|
| Restoration cost | $24,000 |
| New mold replacement cost | $58,000 |
| Savings | $34,000 (59% savings) |
Performance after restoration:
Cycle time: 5.6 seconds (original new condition: 5.4 seconds)
Rejection rate: 0.5% (original: 0.4%)
Expected remaining life: 3–4 years
Customer quote: "The restored mold is almost as good as new. We saved $34,000 and got our production line back up in 3 weeks instead of 12 weeks for a new mold."
Preventive Schedule for Cap Molds
| Activity | Frequency | Who |
|---|---|---|
| Daily cleaning and lubrication | Daily | Operator |
| Cooling flow and temperature check | Daily | Operator |
| Visual damage inspection | Daily | Operator |
| Vent cleaning | Daily | Operator |
| Ejector pin check | Weekly | Maintenance |
| Guide clearance check | Monthly | Maintenance |
| Weight variation test | Monthly | Quality |
| Cooling channel flush | 6 months | Maintenance |
| Professional inspection | 12–18 months | ZSMOLD or qualified technician |
| Complete refurbishment | 3–5 years (or as needed) | ZSMOLD |
Conclusion
Rust, wear, and corrosion are inevitable in cap molding — but severe damage is not. With proper prevention — daily cleaning, regular lubrication, water quality control, and material selection — most cap molds operate for years without significant deterioration.
When damage does occur, prompt repair at the first sign of trouble prevents costly replacement. ZSMOLD has the expertise, materials, and repair facilities to help you both prevent and repair cap mold damage.
Do not wait for damage to become failure. Act early. Repair smart. Prevent consistently.
Contact ZSMOLD today for:
A damage assessment of your existing cap molds
Recommendations for corrosion-resistant materials for your next mold
Our mold restoration service quotation
Preventive maintenance training for your team